Showing posts with label Treats. Show all posts

Sunday, January 18, 2015

Oreo Cupcakes


It has been far too long since I baked anything, and even longer since I posted something fun like this. I love baking, but I always end up eating entirely too much of whatever deliciousness I created. I have tried the single-serving mug cakes and cookies that you can find on Pinterest, but they just don't cut it. Totally not worth the 3 minutes it takes to whip them up. And definitely not worth the 200 calories. So I figure --why not. I'll bake up a little something delicious, and then I'll get rid of the rest. And rather than throw them in the trash or give them to my non-existent friends, tomorrow I'm going to make Mike take them to his office. I'm not sure if his coworkers are into delicious treats, but surely there are some hungry interns lurking around there somewhere.

So, without further ado, here are the results. The Treat of the Week.


Oreo Cupcakes
via

For the Cupcakes
1 box chocolate cake mix
1 package Oreos

Mix up the cake batter according to the directions on the box [hey, i've got to ease my way back into baking]. Line cupcake tins with paper liners, and put an Oreo into the bottom of each liner. Take half of the remaining Oreos, crush them, and stir them into the cake batter. Fill cupcake liners and bake according to the package.

For the Frosting
8 oz cream cheese
1 stick butter
1 tsp vanilla extract
1 package Mini Oreos

Cream together the cream cheese and butter once both are room temperature. Add vanilla and then powdered sugar, a little at a time. Send the rest of your regular-sized Oreos through a food processor, then mix them into your frosting. Frost each cupcake, once cooled, and top with a mini Oreo.

And there you have it. An Oreo cupcake. Because, really. Oreos.

Tuesday, February 18, 2014

Roasted Chickpeas

Well... have you tried the peanut butter/coconut/chocolate balls I shared with you last week? I made a new batch for this week, and they're just as delicious as I remembered. I forgot how messy they are to shape into balls though!

As delicious as they are, I have been in search of more healthy snacks. I ran across several recipes for roasted chickpeas, so I thought I'd give them a try. They were beyond simple, and they're really pretty good. I doubt Mike will be eating them anytime soon, but I think they're a great afternoon snack. 


I didn't know what would be the best seasonings to put on them, so I'll definitely be experimenting. If I find any to-die-for combinations, I'll definitely update you. This time around, I played it safe with a few seasonings I like on just about anything - a dash of salt, and a sprinkle each of paprika, garlic powder, and onion powder. What seasonings sound good to you?

There really isn't much to roasting these little guys. Just rinse a can [or half of a can, as i did] of chickpeas, spread them on a parchment-lined cookie sheet, and bake at 400 degrees for 30 minutes. Shake them around a couple times to help them  bake evenly. Once roasted, remove them from the oven, coat with a little olive oil, sprinkle with your favorite seasonings and stir to coat evenly. Eat immediately, or wait until they're cool. Mine were gone before I even blinked, but it doesn't sound like they're quite as good the next day.

They're cheap, they're simple, and they're really quite healthy. It's a winner in my book!

Thursday, February 13, 2014

Healthy Snack -- Oat Balls

It's no secret that I like to eat. And while I like healthy foods, I really like yummy foods. Cookies, crackers.. you name it. I want something that's going to fill me up and also satiate my taste buds. And let's be real, celery sticks don't always cut it. Granola bars and protein bars are great; they're quick and I can eat them on the go or sitting on the floor playing with Ella. But they can get kind of expensive, and who really knows what's in them sometimes. So I've been in search of some healthier snacks. Something nutritious, natural, and delicious. 

Well guys, I think I've found something. I saw this recipe online at one point and jotted it down, but I don't know where it came from. So if you deserve credit, feel free to claim it - and thank you! [i made some minor changes, i hope you don't mind.]


1 cup old fashioned oats
1/2 cup chocolate chips
1/2 cup natural peanut butter
1/2 cup ground flaxseed
1/3 cup honey
1/3 cup coconut
1 tsp vanilla

Mix ingredients well and shape into balls. 

It's probably the easiest recipe ever, but I really love it and I hope you do too!

Saturday, November 9, 2013

Chocolate Oreo Birthday Cake

You may or may not have realized that my childhood bestie Rachael was in town to visit us last week. Did I tell you that? [maybe once or twice...]

Our birthdays are only three days apart, so we've been celebrating together for years. Whenever we were in the same state, anyway. So this year we had a fun little celebration... we threw ourselves a birthday party! It didn't have many in attendance [really, it might have just been us] but we had a great time!

And the cake was exceptionally delicious. So I thought I might share! 


Chocolate Oreo Cake
Ingredients
1 box of chocolate cake
2 boxes of instant Oreo pudding mix
4 cups milk
1 container Cool Whip, thawed
1 row of Oreos [plus the rest of them for snacking]

Directions
Bake the chocolate cake according to package directions. [it would be easier as a 9x13, but i believe birthday cakes should be round layered cakes, so that's what we had.]
Before the cake cools completely, poke holes in the cake using a straw or similar utensil. Combine the pudding mix and the milk, and allow it to thicken just slightly. Pour this over the cake, helping it get into the holes you poked. Refrigerate several hours.
Once the pudding is completely set, 'frost' the cake with the thawed Cool Whip [i used the light kind, and it worked perfectly]. Refrigerate. Just before serving, sprinkle broken Oreos on top of the cake. Last step:  try not to eat the whole thing at once.


the finished product!

the other party attendees :)

Wednesday, September 25, 2013

Streudel Topped Pumpkin Muffins


I believe boredom has set in. I've been waiting for this bambino to emerge for a while now, and while I've still been filling my time with walks and my daily 1pm meeting with Kathie Lee and Hoda, I've also been crafty this week. You probably saw that fall wreath yesterday; plus I've been re-learning how to crochet. And today I baked some of the most delectable fall muffins, so I thought I'd share. These muffins are definitely worth the trip to the store to pick up a can of pumpkin. 

The original recipe is from this blog, but I'll recap it here as well. Just in case you decide you need to try them. [trust me, you do]


Muffins
1 1/2 cups flour
1 tsp baking powder
1 tsp pumpkin pie spice
1/2 tsp baking soda
1/2 tsp salt
1 tsp cinnamon
1 cup pure pumpkin
1 1/4 cups sugar
1/3 cup oil
2 eggs

Strudel Topping
1/2 cup flour
1/3 cup brown sugar
1/4 cup chopped walnuts (optional)
3 tbsp butter, softened

Directions
Preheat oven to 350.
Combine the first six ingredients in a medium sized bowl; mix and set aside. In a larger mixing bowl, combine the remaining four muffin ingredients. Slowly add in the dry ingredients, and stir until incorporated. Mix the strudel topping ingredients in a small bowl.
Spoon into muffin tins [i used mini muffin tins, because then you can have more than one].
Sprinkle each muffin with strudel topping.
Bake at 350 for 10 minutes [or 15 minutes for regular-sized muffins], or until they pass the toothpick test.


I hope you enjoy!


Saturday, July 27, 2013

S'mores Bars

This week was the annual Vacation Bible School week at the church I grew up in. It's a pretty fabulous week, and it's fun seeing kids make the same fun memories that I made growing up. The last day of the week ends with an ice cream social, which I was asked to make bars for this year. I didn't know what kind to make, so I of course perused trusty ol' Pinterest, and I stumbled upon some s'mores bars that I have been eyeing for quite some time but never had a purpose to make them. This seemed like a good excuse to me! The original recipe can be found here or you can keep reading.


What you'll need:
11 Tbsp butter at room temperature
1/2 cup sugar
1 cup brown sugar
2 eggs
1 1/2 tsp vanilla
1/2 tsp salt
1 tsp baking soda
1/4 tsp cinnamon
2 1/2 cups flour
1 1/4 cups mini marshmallows
1 cup semi-sweet chocolate chunks
3/4 cup semi-sweet mini chips
3 Hershey's bars broken into rectangles
2 packs of honey graham crackers


What you'll do:


 Using a mixer, cream together the butter and sugar. Add the eggs one at a time, mixing after each one. Add the vanilla and mix again. 

In another bowl, combine the flour, baking soda, salt and cinnamon. Mix this into the creamed ingredients a little at a time [or you'll have a heck of a mess].

By hand, stir in 1 cup of the mini marshmallows, as well as the semi-sweet chocolate chunks and mini chips. 

Chill in the fridge for 15 minutes.


Meanwhile, break the graham crackers apart and arrange them in a single layer on a baking sheet as shown here.


 After chilling, scoop spoonfuls of the bar mix onto the graham crackers, much like if you were making cookies. Fill in the gaps until you've used all the bar mix.

Bake at 375 for 6 minutes.
Press the Hershey's rectangles into the dollops of bar mix, then place the remaining 1/4 cup of marshmallows into some of the holes.

Bake for another 7 minutes.

Cool completely then cut.

Enjoy!


Good luck eating just one. 

Tuesday, April 30, 2013

Lemon Crinkle Cookies


It's finally Spring in Minnesota! It took long enough to get here, but enough complaining about that. The first day the sun was shining and we had our windows open, I decided I needed a little something from the kitchen that made it feel like spring as well. [of course i needed something from the kitchen...]

I saw something on Pinterest and ran with it. I looked at several similar recipes, and this is what I came up with. The simplest, quickest little lemon cookies. They're so easy you might even judge me for what's in them. I'm ok with that... they took under a half hour to make, including washing dishes. And I didn't even need a measuring cup! They're light and lemony-- perfect for spring. And Mike's favorite part:  they're soft!  [first words out of his mouth when he took a bite]

What you need
1 box lemon cake mix
8-oz container of Cool Whip, thawed
1 egg, lightly beaten
about 1 cup powdered sugar, in a separate bowl

What you do
Preheat oven to 350 (because my oven takes about three hours to preheat). 
In a large mixing bowl, combine the cake mix, egg, and cool whip. It will be very sticky! Take a generous tablespoon of the batter, roll it into a ball the best you can, and roll it in the powdered sugar. Bake for 9-10 minutes, just until the edges start to turn golden-brown.


That's it! They kind of resemble lemon bars, except they aren't as dense as those sometimes are. And they're much quicker to make!

I hope you're enjoying your Spring, wherever you may be.


Saturday, November 10, 2012

Wedding Cake Baker

Amid the many summer weddings that come from being a twenty-something, a friend of mine asked me to make small wedding cake for his nuptial celebration. It started as more of a joke, but it came to fruition early this fall. 

Per the groom's request, the cake was two-tiered red velvet with cream cheese frosting. Per the bride's request, it was round and covered with fondant and yellow flowers.

I had never made a cake of this caliber before, just cakes and cupcakes for birthdays and showers. But with the helping hands of a couple friends, the cake came together. It certainly isn't perfect, but it was delicious and great for my fondant debut. I got many compliments, and even some disbelief that it was my handiwork.  


Setting up the cake at the reception hall

The finished masterpiece!


Here's a video of the bride and groom cutting the cake with a sword--
 a long-standing tradition of the groom's family


Saturday, March 24, 2012

7-Layer Taco Dip

It's been quite a while since I posted anything besides a run-down of my Laramie adventures. So I thought maybe it was time to spice things up a bit. Here it is: a bonus post this week. 


The Cancer Center staff had planned a Bunco night as a fundraiser for their Relay for Life team. I had no.clue how to play, but they assured me that it was brainless enough that it would be fun and easy to learn. Everyone was to bring an hors d'oeuvre to share. However, my kitchen supplies here are quite limited, and I didn't want to go buy a bunch of supplies. And of course I had to take something that was meat-less.


So after chatting about it at work on Thursday, one of my patient's daughters gave me a fool-proof 7-layer taco dip recipe that she said has gotten rave reviews time and again. Sounded great to me!


Here are the layers, in order from top to bottom:


Black Olives
Shredded Mexican Cheese
Lettuce & Tomatoes
Guacamole
Chunky Salsa
Sour Cream
Refried Beans


It was quick & easy to put together, it kept well in the refrigerator overnight, and it was delicious! I served it with my favorite tortilla chips, and it was a hit!


You could also make this in a low-fat version, using low-fat sour cream, fat-free refried beans, and 2% cheese. I have a feeling it would be just as delicious!


Bunco was very easy to pick up and we all had a great time. We even raised $200 for Relay for Life in one fun and entertaining night!


Friday, December 30, 2011

Tomato & Black Bean Quinoa

It has been a while since I shared a recipe with you. But trust me, the wait was well worth it. 


I wanted to make something that I could take for lunch at work for a few days. This recipe looked delicious, seemed healthy, and appeared as though it would be just as good leftover. And  and extra little perk... it's vegan! If you want a light, easy recipe, I highly recommend this one.


Here's the link to the recipe:  
http://www.epicurious.com/recipes/food/views/Black-Bean-and-Tomato-Quinoa-238939

I added a diced cucumber and made the quinoa according to package directions, but otherwise I used the recipe just as it is. You won't be disappointed!


I hope you enjoy it just as much as I do.


To a healthy 2012... ENJOY!

Sunday, December 25, 2011

Christmas in Kansas City

This year I'm spending Christmas in Kansas City with Mike's family. We've had an eventful couple of days already... We ate lasagna and various Christmas cookies, watched the Raiders narrowly beat the Chiefs in overtime, and we just finished making Christmas wreath cornflakes cookies -- a Wierzbicki family tradition. Mike's middle brother delegated to me his usual task of shaping the cornflakes into wreaths with Mike's mom, Marie. My fingers are now green, but they turned out great... The boys have already starting eating them!

Marie and I shaping the wreaths

The finished product with the Christmas flower arrangement

Christmas wreaths!

Merry Christmas!!

Wednesday, November 30, 2011

Fruit Kabobs

Potlucks. We have them a lot at work, mostly because cafeteria food is gross and leftovers are boring. And they're great for workplace morale.

Well, we had another one earlier this week. It's really easy to bring a bag of chips, box of crackers, bottle of soda, or another pre-packaged food. Really easy. And cheap. But unhealthy.

I wanted to take something somewhat healthy, but I also wanted it to be fun. Someone else was bringing the main dish, so... Fruit? Vegetables?

Once again, pinterest pulled through. No surprise there. [check it out if you haven't already. you won't be sorry.]

Fruit Kabobs. They would be super fun for little kids, but they're also fun for big kids.


Just as a side note... delicious fresh fruits in Nebraska are:
    A) hard to find
    B) kind of expensive
    C) totally worth it

Monday, August 8, 2011

Cupcake Delivery


Between four days in Florida and four in Minnesota, I worked 40 hours and baked 3 dozen cupcakes... in a 3-day period.

Who needs sleep anyway?

A friend asked me a couple weeks ago if I'd make cupcakes for a meeting she was hosting. Absolutely! She didn't have any flavor or decor requests, so she got my favorites. I boxed them up real cute and delivered them. At 6am. I'm so glad someone else has as weird of hours as me. No wonder my bedtime is 9:30pm.

But despite the time crunch and the early delivery, they still got rave reviews.

"Hey Amy! Just wanted to let you know that your cupcakes were a HUGE hit!! Everyone loved them!! Their fav flavor was the pink lemonade!! ... Next time I'll have to order more.  Since there weren't leftovers my poor husband didn't get one."


Buy your stock now.
It's the beginning of a booming business.

Thursday, July 14, 2011

Strawberry Lemonade Cupcakes

During this summer of poorly-fitting swimsuits and shorts, I've tried to keep the sweets to a minimum. (Emphasis on the tried.) But I decided that our staff meeting at work needed a little something special, a little morale boost, a little pizzaz. So I dug out a summer recipe I've been wanting to try. Here are my results:


Strawberry Lemonade Cupcakes
*from Annie's Eats*


For the cake: 
2 1/4 cups all-purpose flour
1 1/2 tsp baking powder
3/4 tsp salt
2 tsp lemon zest
12 tbsp unsalted butter, at room temperature
1 1/2 cups sugar
2 eggs
3/4 cup milk
2 cups fresh strawberries, chopped


For the lemonade syrup: 
1 cup lemonade concentrate, thawed
3/4 cup powdered sugar


For the frosting
1 cup fresh strawberries, roughly chopped
12 oz cream cheese, at room temperature
18 tbsp unsalted butter, at room temperature
2 2/3 cups confectioners’ sugar, sifted
3 tsp lemon juice
1 tsp vanilla extract


Directions:
- To make the cupcakes, preheat the oven to 325 degrees.  Line muffin pans with paper liners.  In a bowl, combine the flour, baking powder, salt and lemon zest.  Stir together with a fork and set aside.  In the bowl of a stand mixer, beat the butter on medium speed until it is light and fluffy.  Add the sugar and beat until well combined.  Beat in the eggs one at a time, scraping down the bowl after each addition.  Add half of the flour mixture to the bowl and beat on low speed until just incorporated.  Add in the milk and mix until smooth.  Add in the remaining flour mixture and mix on low speed until just blended.  Fold in the fresh strawberries with a spatula.

- Divide the batter evenly between the cupcake liners, filling them about 3/4 full.  Bake about 20 minutes or until a toothpick inserted in the center comes out clean.  Allow to cool in the pan 5 minutes, then transfer to a wire rack to cool completely.
- Once the cupcakes have cooled, whisk together the lemonade concentrate and confectioners’ sugar in a small bowl to make the lemonade syrup.  Poke several holes in the top of each cupcake with a skewer and pour the syrup over the cupcakes, allowing it to soak in.  (Place wax paper underneath your cooling rack so you don’t make a mess!)
- To make the frosting, puree the strawberries in a food processor or blender.  Strain the puree through a mesh sieve to remove the seeds, and set aside.  Beat the cream cheese and butter in the bowl of an electric mixer on medium speed until smooth and very fluffy, about 5 minutes.  Add the powdered sugar and mix until smooth.  Add the lemon juice and vanilla extract and mix until incorporated.  Mix in strawberry puree, a tablespoon at a time, until you achieve your desired texture and flavor of frosting.  Frost cupcakes as desired, and enjoy!


This recipe is definitely a keeper!

Wednesday, July 6, 2011

Monkey Bread

I realize my "Treats" section is growing faster than any other section, but welcome to my life. No denying it:  I love food.


After more than 30 years of hard work and dedication, one of my coworkers is retiring. Kathy has been one heck of a role model; she has taught me more than I could have imagined, and she has shown all of us "newbies" what it means to be a great nurse. I can only hope I last it as long in this field as she has.

Despite her seniority, Kathy still works the night shift. Usually it's the new graduate nurses who are subjected to working nocturnally, but Kathy is finishing her career on the graveyard shift. Because of this, the Retirement Party we hosted for Kathy was held at the end of her shift: at 7am. Not many workplaces have a 7am party, but we weren't opposed.

So what was I to make for a breakfast potluck? Egg casserole, coffee, juice, and fruit salad had all already been DIBS'ed by others. So why not monkey bread? I hadn't had monkey bread in years. Not since my waistline started caring what I eat for breakfast. But a retirement party? Good excuse to make it!

(However, I made this at 5:30am before going into work, so I was a little lacking on the pictures. Sorry--a very brief peek is all you get.)

Monkey Bread
adapted from The Pioneer Woman's recipe

3 cans buttermilk biscuits
3/4 cup sugar
3 tsp cinnamon
3/4 cup butter
1/2 cup brown sugar

Cut the biscuits into quarters.
Combine the cinnamon and sugar in a large bowl or ziplock bag. Add the biscuits shake to coat all the biscuit chunks with the cinnamon-sugar. Place the biscuits into a pan.
In a sauce pan over medium heat, melt the butter. Stir in the brown sugar, and simmer for a few minutes until the brown sugar dissolves as much as it can. Pour the butter/brown sugar mixture over the biscuit chunks. Bake at 350 degrees for 35 minutes, or until brown on top and no longer dough-y inside. Cool and invert onto a plate.


When I got to work, the monkey bread was still warm. The plate was empty within 5 minutes of the party starting. I think it was a hit.


I guess if you work the same job for 30+ years,
you deserve to indulge.
Happy Retirement, Kathy!

Wednesday, June 29, 2011

Baby Shower Cupcakes - Baby Kasey


Apparently when you have a baby, you get to have showers. Yes, plural. It's a fact that's definitely been proven in my life lately. I think maybe I should get a Babies-R-Us rewards card just for buying friends' shower gifts! Lots of coworkers and friends have been having babies lately, so I'm getting pretty good at shower etiquette.

A couple weeks ago, it was Kayla's turn for a shower. It was being held on a day I was to work at the hospital, and I was bummed I couldn't attend. But Jill (the hostess) asked if I would be on cake duty. Of course!

But two days before the shower, the pressure was on. How could I possibly make cupcakes that were good enough to deliver to a shower that I wasn't even going to? This was the second closest I've ever been to being "hired" for an event. And with minimal direction? Talk about pressure! What flavors should I make? How would I match the theme? How do I decorate said cupcakes?

So I kept it simple. The colors for the shower were watermelon and lime green, and it had an ABC theme. With limited time, space, and supplies (I was house-sitting, so I was in unfamiliar kitchen territory), I did the best I could. I think they turned out pretty well!


I made two kinds of cupcakes:  Black Forest and Strawberry Whipped Cream. I adapted both recipes slightly, but the black forest was a definite winner in my book.


After all the cupcakes were baked, filled, and frosted, I put on the toppers. I tinted some fondant, cut out circles, and put a "k" on each circle using edible marker -- to go with the ABC theme, the K for Baby Kasey.


Transporting these cupcakes in 90 degree heat was a disaster, but hopefully they made it to the shower with minimal harm. Definitely learned a valuable transportation lesson!


Congratulations Kayla and Brett,
I can't wait for Baby Kasey's arrival!
And great work throwing a fabulous shower, JilL!

Monday, June 13, 2011

Sparkling Strawberry Lemonade

Remember the other day when I said that a hot summer day called for a glass of cold lemonade? Well I wasn't kidding. I made this lemonade for my friend's baby shower I hosted a couple weeks ago. It was ah-mazing, and I just had to share it with you. I'm certain I'll be making it again before the end of the summer.

And just as a side note, I'm pretty sure you could replace the sugar with something less... sugary. Splenda? Truvia? Stevia? I'm not sure, but I'm sure something would work, and I think your blood sugar and waistline might be a little happier (in other words, guilt-free indulgence).

Sparkling Strawberry Lemonade
adapted from Emeril's recipe
2 cups water
1 cup sugar
1 cup fresh squeezed lemon juice
1 tbsp lemon zest
1 pint strawberries, halved and hulled
2 cups cold club soda

In a saucepan, bring the water and sugar to a boil. Add the lemon juice and zest, remove from the heat. Cool, then strain into a pitcher to remove zest and any seeds or pulp.

In a food processor, puree the strawberries. (You could strain the strawberries if you don't want any seeds/pulp, but I thought it gave it a little pizzaz.) Add to the pitcher, and stir well. Add the club soda just before serving. Serve over ice.


This recipe went over extremely well. It was gone by the end of the day, and I even tripled the recipe for the shower. (Yes, I squeezed a dozen and a half lemons. By hand.) I'd say it's a keeper.


Bring on the heat.
I can now conquer summer.

Pizza (Quick and Healthy!)

This little recipe materialized from my fridge, spurred by a weekend refusal to eat a salad for lunch.


I used only things that were already in the fridge... which these days consists of essentially only fresh fruits and veggies. And cheese. Apparently that's the only way Molly and I can eat healthy.


4 1/2 Point Pizza
1 Flat Out flatbread
1/4 c shredded 2% mozzarella cheese
1/2 c marinara sauce
17 slices turkey pepperoni
chopped onion
chopped bell pepper
chopped fresh basil


Place the flatbread on a foil-lined cookie sheet, and spread on the marinara sauce.


Sprinkle on the cheese. Top with pepperoni, onion, bell pepper, and basil. (Or use whatever toppings you'd like--this is what I had in the fridge).

Bake at 350 until the cheese is melted and all is warmed thoroughly, mine was about 15 minutes. Let cool slightly, and cut.


And Voila!
A quick, healthy pizza that didn't even require a trip to Trader Joe's.
Double bonus.

Wednesday, June 8, 2011

Summer Lunch

A humid, 90-degree summer day calls for fresh squeezed lemonade, the pool, and popsicles.

And a refreshing light lunch. Something that requires no cooking and minimal clean-up.

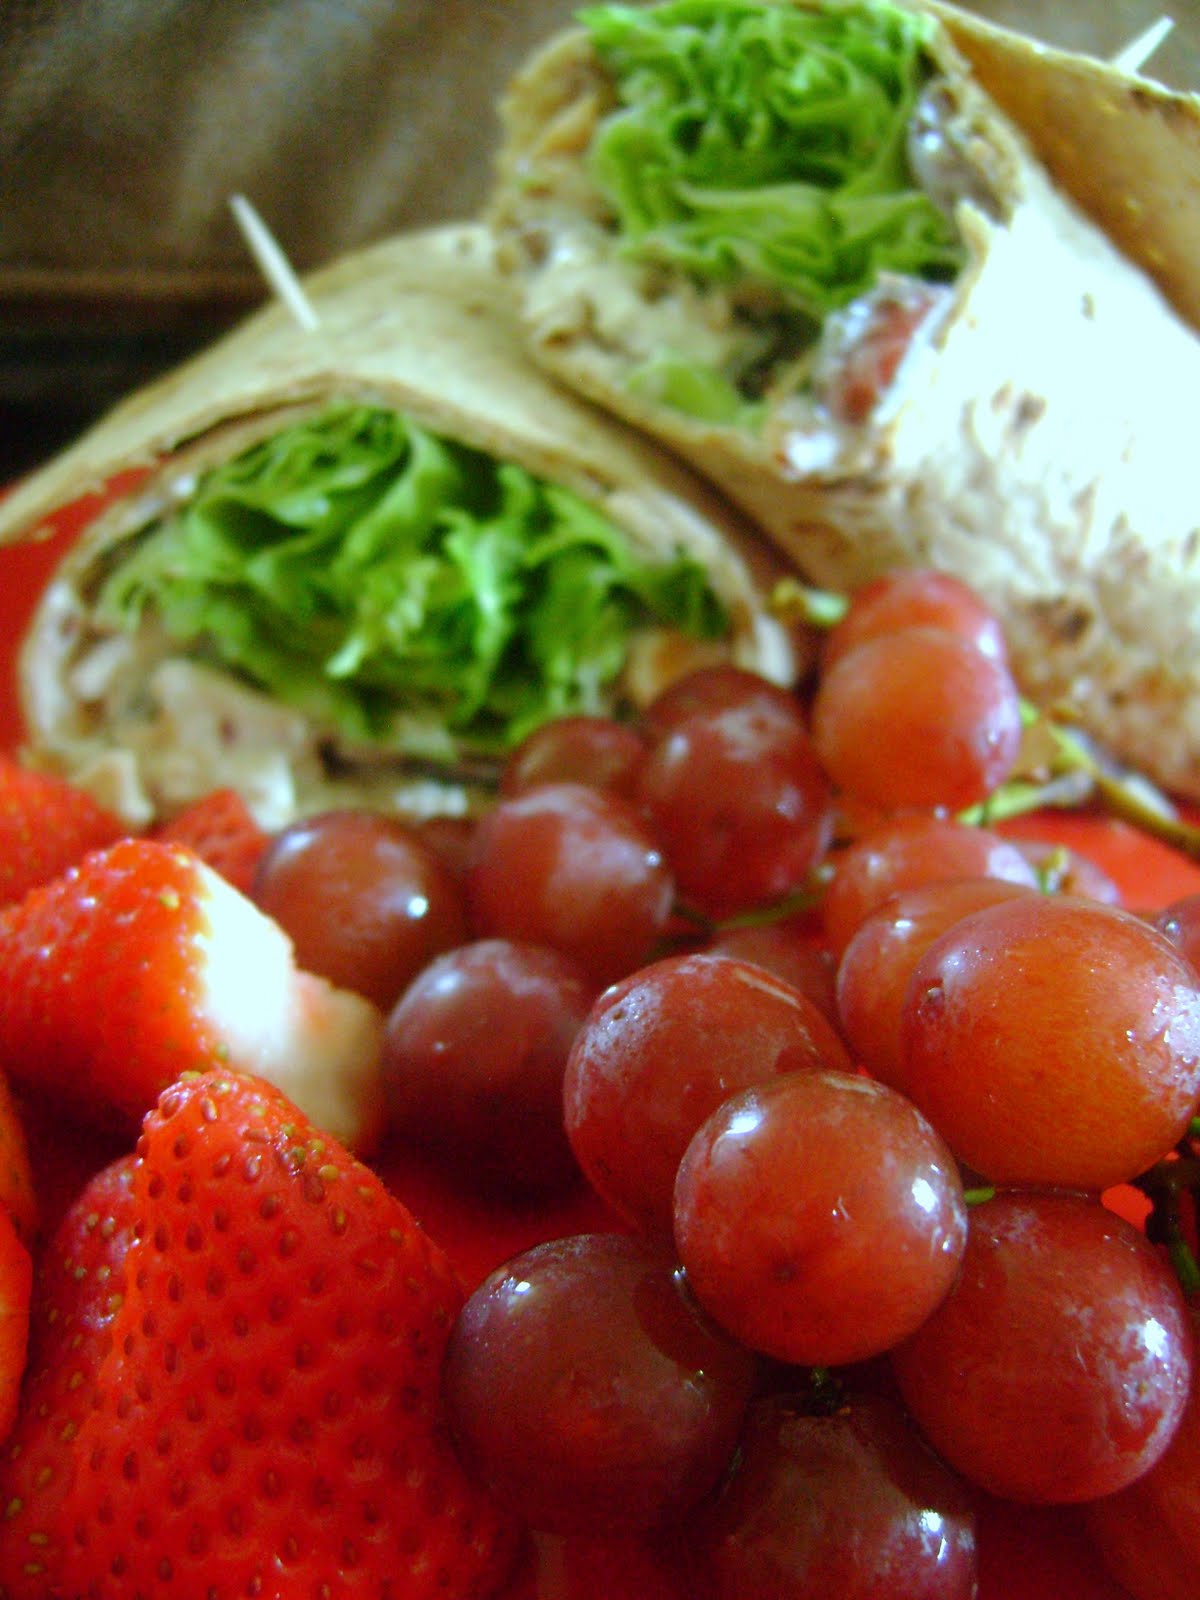
I just so happened to have some chicken salad in my refrigerator from a baby shower I hosted over the weekend. Perfect. Add some lettuce and a wrap, some fresh fruit, and suddenly you've got a summer-approved meal.


Mmm, Delightful.

(And yes, there will be coverage of the baby shower once I receive loaner pictures...
 I failed massively on taking any pictures during it.)

Tuesday, May 24, 2011

Cupcake Stand

For a few weeks now, I've been (unsuccessfully) looking everywhere for the perfect cupcake stand. I'm not a huge fan of those wire ones they sell at Target and Hobby Lobby, and I don't think the plastic ones are very classy. I just haven't found one I love. So I did what I do every time I can't find what I'm looking for  -- I looked online. Still, not much to be found.. especially not in my price range. Then it occurred to me. Maybe I could just make one. I'm crafty, right? Sort of.

I finally found one that was appeased me and was pretty simple at Annie's Eats. If you haven't already, check out her blog. She's one amazing woman.

I picked up the things that I'd need, and I got to work. (Yes, at 8:30 this morning. Over a cup of coffee, sitting next to Molly as she blogged about her engagement. What a wonderful world!) Here's a run-down of what ensued:

Supplies
Hot glue gun
Two 8-inch cardboard rounds
Two 10-inch cardboard rounds
Two 12-inch cardboard rounds
Ribbon
Two cans from your pantry (of something that's been there for a substantial amount of time)
Sheet of cardstock
Scissors

How-To
Once your glue gun is pre-heated, take each pair of cardboard rounds and glue them ugly-side-together with their partner (the 8-inchers together, the 10-inchers together, and the 12-inchers together) so that you have three more sturdy circles of cardboard, white on both sides. Or gold if you splurged and got the fancy cardboard rounds.

Hot glue the ribbon around the circumference of each cardboard round. You don't have to glue all the way around, just every couple of inches so the ribbon stays in place and doesn't droop. If you have more transparent ribbon, you might need to go around the circumference twice.

Next measure your cans and cut the cardstock so it will go around each can to cover the label. My cans were 4 3/8 inches tall, so I essentially cut my cardstock in half lengthwise. Wrap the paper around the can then hot-glue it in place. (Sorry Mom, not eating those green beans!)

If you're using your cupcake stand soon, you could glue the cans & rounds together to make your tiers, but if you're transporting it you can leave them separate and put them together once you're at your destination.


And voila! Here's my finished product. You can obviously use any ribbon you want, but I thought this would be pretty versatile. And I think I might put another stand underneath the whole thing so the bottom tier sits up off the table a little.


And since this cupcake stand will initially be used at a friend's baby shower, here are the cute new-baby-boy cupcake papers I found. It's a lot of polka dots, I know, so I might have to revamp things a little. But for now.. So Super Adorable!